After Effects - created for video post production
Can import photoshop and illustrator documents - layered documents manipulating individual layers - lots you can do with it.
Today looking at the very basics.
Document set up.
Details.
Layers.
Exporting.
later sessions wil be more complex
Tip of the day.
Orange line highlights the area your working in. clicking on a different area will highlight that area instead.
Layers
Layers over time
Composition
Important menus for applying effects
window menu is similar to photoshop and illustrator, the ticks show which windows are open.
New project jsut reloads the startup screen.
New composition will allow you to start your project. You can have multiple compositions within a project.
New Composition pop up box
Presets. We use Pal in England. The bottom half of the drop down box is used for video.
Today we're using Pal D1/DV widescreen Square Pixel.
This gives you this presets default settings.
- Frame rate 25 frames per second
- 30 seconds of duration
-background colour, black
This can be changed now or later on it doesn't have to remain this way. You just need to go to the Composition menu and then select Composition Settings to get this pop up window again.
The background colour is black because its in the colour mode RGB so the colour value is 0. This is the opposite for print where it would be a white background as you can't print white.
This is what the default composition looks like.
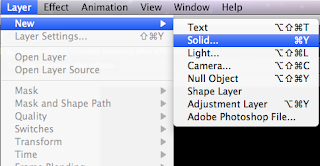
Layers
Pop up window for new solid layer
Name your layers.
Change the height and width by clicking and scrolling along with the mouse over the yellow numbers, or you can click the dotted line under the number and type the numbers yourself.
you can also choose a colour and the click ok to create your layer.
The red bar shows the time of the composition, you can shorten this red bar on individual layers or position them so that compositions over lap and happen in sequence, this extends the length of the project.
Adding a second layer, keeping the dimensions the same but changing the colour and giving it a different name.
The yellow arrow in the time area indicates where you are in your composition as it plays through, you can start playing your composition by pressing the space bar on the keyboard. You can also use the home keys to jump to the beginning and the end of your composition.
You can change the layers using the options in the drop down menu that comes with each individual layer. You can change:-
- anchor point
- position
- scale
- rotation
- opacity
Key frames.
By clicking the little circular symbol in these drop down menus you create a key frame. Its an additional bit of information on a particular frame that signifies that start of an effect.
For example, Position.
Selecting position whilst viewing the frame you want in the composition window, you mark when your position change will begin.
Then you move the cursor on the time bar to where you want the movement to end and you drag the layer to where you want it to move to. You will see a line that goes between the two positions, this is the path the layer will take when moving.
Now when you play the composition it will move from the first position to the second over that period of time that you have determined
SHORTCUTS
THE TILDA KEY.
(lives between the Z and the Shift key)
Allows you to get a full screen view of any of the windows in after effects. Similar function the the W key for Indesign when it takes away the guides and marks so you can see a blank page.
PASRT
Each key P, A, S, R and T is a shortcut:-
- P = position
- A = Anchor point
- S = Scale
- R = Rotation
-T = Transparency
I & O
(In and Out)
These shortcuts are for jumping to and from the beginning and the end of a layer.
U
Shows all applied effects on each manipulated layer, pressing it twice in quick succession gives you more details.
CMD + D
This duplicates any layers you have selected.
EXPORTING
Add to render queue
New window where the composition menu is
Output module
change animation to H.264
Your project will only start exporting when you click the render button in the render queue window.


No comments:
Post a Comment